Ryan likes being carried in our Ergo carrier, but he tends to chew on the straps when he turns his head... he's at the age where anything and everything possible has one destination: his mouth! I can only imagine that as he gets older and taller than he will want to chew on them all the more. Since I wear him every day (multiple times!), I can't really be throwing the Ergo in the wash all the time to get the spit and saliva off of the straps from his chew-fests. I thought about buying the "official" drool pads with the carrier, but after seeing another tutorial, I figured I could just easily make my own.
The supplies! I don't think I need to list everything off... but you need the basic things (sewing machine, scissors, pins, etc), plus three fabrics (two for the outside and a middle layer, something like flannel) and velcro. I tend to raid the remnant rack at JoAnn fabrics... you can get nice fabric for half price there. Or I go to the thrift store and search there... I'm cheap, I know :]
My outside layer that I wanted to "show" is a soft cotton, the back side is a soft flannel, and the inside is flannel as well. The inside flannel, which is the blue one, is just one of those flannel baby blankets. THRIFT STORE! :] The green fabric and grey fabric are from the remnant rack.
I cut three rectangles from each fabric, for each drool pad. I cut out a 9 1/4" by 6 1/2" piece of paper and used that as my template to sew by, but I left the pieces of fabric with random edges that I would trim later. I like to do things the hard way. If I was doing it easier (and I totally suggest you do it this way), I would have just made my pattern 1/2" bigger on each side and just cut each piece of fabric out from there using my rotary cutter and mat. But no, I like to do things the hard way. :]
Lay each layer of fabric on the table, starting with the side UP that you want facing OUT. Place your second 'outer piece' face DOWN on that, and then finally put down your middle piece.
If you want a strap to hang toys from, cut a piece of fabric, fold it, and sew it. It doesn't matter how long it is.
Like I said before, I like to do things difficultly... so I drew around my pattern and planned to sew on that line. DUMB. I don't know why I did that. The line isn't straight. I've never used a line before for sewing. Like I said before, I should have just made my pattern a little bigger and cut it out with my rotary cutter. OR... I could have used a ruler and made straight lines. That wouldn't have been a bad idea. No big deal, though. The above photo shows how you should place the "toy strap" on the fabric... but you want to place the loop towards the inside, BETWEEN the two "outside pieces" of fabric (in my case, between the green patterned fabric and the grey fabric).
Pin it!
Then you sew around the edges, but leave an opening so you can turn your fabric the right way. After that, you trim away the excess fabric. It's best if you leave some fabric in front of the opening so that you have some fabric to tuck inside when you sew it again.
Turn it right side out. You should iron it flat at this point... but if your iron is still in storage (*sigh*) from when you moved to Kenya for a year... just pull the edges out as flat as you can.
Then stitch around the edge again, tucking in the little flaps in the opening.
Cut two piece of velcro to fit, and pin them on as shown above.
Then sew them on!
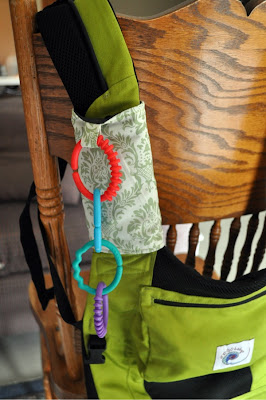
Aaaand... you have drool/chew strap covers. Not perfect by any means, but a fun and pretty simple project!
Unfortunately (well, actually, fortunately) my baby is taking a nap so I can't model him in the Ergo with his new strap covers. But I will sometime soon, and post a photo. But for now, you'll have to deal with my chair wearing the Ergo for me. ;]
*edited on 8/1/11 to add*
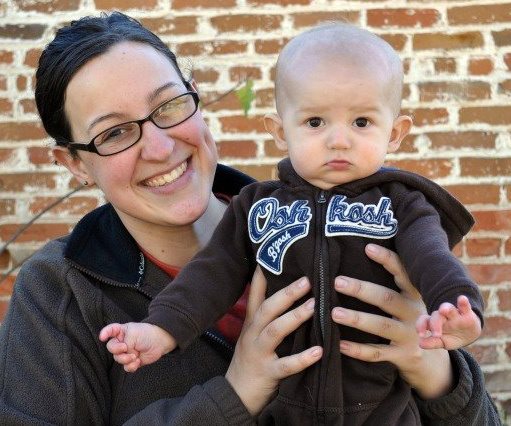
If you're here from Craft Gossip Sewing... eek! I'm totally flattered and equally freaking out right now! I've never been featured on any other blog before!! Thanks for dropping by my humble little blog... link back to your blog so I can come say hi to you, too!! Oh, and here is one (not so great) photo of Ryan enjoying the Ergo with the toys and strap covers... I keep forgetting to take a better photo!


3 comments:
That's really cool Laura!
Great idea!! And I love that it has hang-y loops for a toy.
I linked to your tutorial on Craft Gossip Sewing:
http://sewing.craftgossip.com/tutorial-drool-pads-for-ergo-baby-carriers/2011/08/02/
(link will go live tomorrow morning)
--Anne
This is just perfect for my next project. When my pognae-carrier arrives I will get right on this!
Thank for the great tutorial!
Post a Comment