Saturday, July 30, 2011

Making New Stuff Look Old {tutorial}


It's no secret: I love old stuff.

Coffee cans.
Buttons.
Cigar boxes.
Blue Mason jars.
Books that are falling apart.
Window frames.
Tea canisters.

...but finding those "treasures" can difficult and sometimes expensive. But we all know how much fun creating something yourself is, though, right? I saw this really neat way how to make something look as though it has layers of aged peeling paint, and I thought it looked really awesome! So I gave it a try and got really excited about sharing it. I hope you have fun with it, too!

You need:
An object to paint (I have the letter "H" but you can paint just about anything!)

Paint (I have brown, vanilla and light blue)
Brush
Sandpaper

Bar of soap (like Dove)


Decide how many layers/colors you want on your object. Paint your base color. If your object is already a color you like then you don't have to do this step.


I liked painting it so it looks kind of grainy, like wood. 


After it is completely dry, rub a bar of soap in the spots you want it to look aged/peeled.


 (I'm not really left handed. This was for photo purposes only. Haha...)


Then paint your second layer of paint. 


After it is completely dry, use sandpaper to remove the paint where you soaped your object. Only the paint covering the soap will come off easily, so you can sandpaper the entire thing lightly and it will only remove the wanted paint. 


If you want more paint to look aged on this layer, add some more soap, and then your 3rd layer of paint. Avoid the areas that you already sanded. I rubbed some of the blue paint around the edges of the already peeled areas. If you want, you can wait to do the sanding until the absolute end... but you need to remember where you "soaped" with each layer and put it in the same spots. I decided to play it safe and sand it between layers. 


Then sand the top layer. 


To add to the aged look, rub some brown or dark paint onto the object. 


The finished product:


The H was the second time I tried this technique; I painted this letter D last night, and interestingly, I like my first try better than my second. ;) Unfortunately my last name does not start with a D so I cannot trade. This basket is the start of a birthday gift for a friend who also has the same "rustic/vintage" taste that I like. The mason jar will be turned into... well, you'll have to wait until the next post for that. :)


I think I like that it shows more of the layers of paint... you can see the vanilla color a lot more. It looks more "rough" and I like that! 


High Definition? Naw, just last names. :) Maybe I'll "touch up" my H a little so it looks more rough. Yes, I think I will do that...


Enjoy! 

Thursday, July 28, 2011

{ embrace the camera : 7.28 }


I'm linking up with Emily today for ETC! You should, too. :]


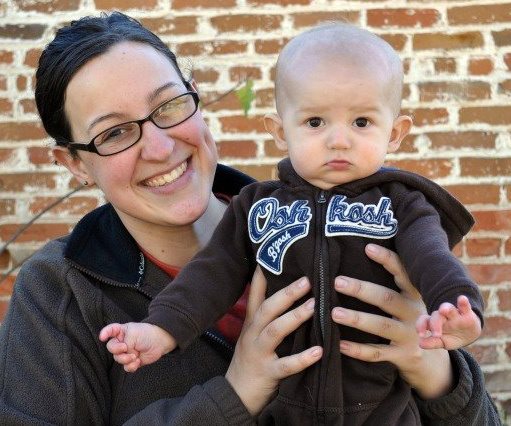
Here are some photos of me and (almost) 6 month old Ryan enjoying our new swing. He loves being outside!!


Wednesday, July 27, 2011

Baby and Toddler Leg Warmers { tutorial }


"Baby Legs" (I think that is a registered trademark, so pretend I didn't say it) are like little leg warmers for babies. They are perfect for use with just a onesie... they make diaper changes and potty trainer easier (quicker access) and protect those tender knees when learning to crawl. You can buy them online, but at $12+ a pair... they are definitely not in my budget! :] So I found a tutorial to make them.

I looked in the "little boys" section for some long socks but couldn't find any... boo. So I wandered over to the girl's section, and was blinded by a huge variety of rainbow covered socks. Like a huge display of them.

Side note: am I the only one who is "annoyed" by the amount of boy clothes vs girl clothes at stores?? I guess "annoyed" is a strong word because it's not like I enjoy shopping anyways.

Carrying on...

I picked out the least girly socks I could find from the girly sock section... but I decided they were still pretty girly. So I'm going give them to a friend of mine (shhh, don't tell her!) who is having a baby girl in around the beginning of November. It's like the perfect time to have cute little leg warmers... she can wear them just with a onesie, or under a skirt a pair or shorts for a cute layered look... oh, it's going to be so much fun for my friend to dress up a little girl!

Another side note: YES, boys can wear leg warmers too... look how cute this little guy is from the Baby Legs website! (although I think MY son would be sweating buckets wearing the shirt + sweater + vest combo )


Anyways. HERE is the tutorial for the leg warmers. I put one of the pairs I made on Ryan, just to test them out... they are pretty much super cute. 


Homemade Ice Cream in a Baggie


I found a fun blog recently (okay, a LOT of fun blogs!) and this one had a super simple recipe for home made ice cream in a baggie. Not gonna lie, I do have store bought ice cream in my freezer (per the hubby's request), but some of the ingredients aren't so friendly looking! Plus we all know how yummy home made ice cream is. This recipe is for a single serving of ice cream, made individually... a fun thing for kids to do (or a SAHM who just needs something to do, haha...). 

Check out this blog article for the recipe, along with pictures! I made some yesterday but it's back in my freezer, though, minus three bites ;) I like to savor my treats since they are few-ish and far-ish between. ;)

Monday, July 25, 2011

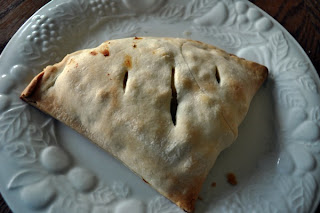
Chicken Pot Pie Empandas


I tried something a little different for dinner recently. I had the fixings for a chicken pot pie but decided to make them into "empandas." I definitely cheated this time and used store bought crust (shame on me, haha), but I usually make my own. I was short on time so this helped things go a little faster. 

Just use any chicken pot pie recipe for the filling, like this one. Cut your pie crusts into quarters and put the filling inside, pushing the filling almost to the corners, but not quite. You need to leave room on the edge to seal them. Dip your finger in some water and rub in around the edge of the crust, and then layer another piece of crust on top, pressing to seal the edges together. Cut slits in the top to let the steam escape.

I baked these at 350* for about 25 minutes. 

If you like a lot of crust, this is a good recipe for you. :) 


The empandas were pretty big (1/4 of a chicken pot pie, if you think about it)... just right for my husband, but a little too much for me... even though I really like crust. And chicken pot pie. :)

Friday, July 22, 2011

[ five month stats ]


Ryan may be look petite, but he certainly is gaining weight now! He's been pretty steadily gaining a pound a month for the last 2-3 months. I think he looks "small" because he is so LONG... this boy is going to be tall like his mama!! 

five month stats:
a whopping 14lbs
26 1/2" long
That's a pound and a half in a month and a half. :] He slowed down a little bit with his height... but he HAS grown 5" since he was born... that's a lot! Don't ask me about percentiles and all that jazz because I only take him in to get weighed and it wasn't an actual pediatrician appointment. Plus I think those charts are dumb anyways. :]

Here's some eye candy! :]

 ["MOM! Pulll-eeeeeze give me the camera?! I need a chew toy!"]

 ["Almost got it...!]

 ["You know you want to give it to me. I'm so CUTE!"]

["Fine. I'll eat your fingers instead."]

[so blurry; but isn't that just a face you just want to kiss all over?!]

Drool Pads for Ergo Carriers {tutorial}


Ryan likes being carried in our Ergo carrier, but he tends to chew on the straps when he turns his head... he's at the age where anything and everything possible has one destination: his mouth! I can only imagine that as he gets older and taller than he will want to chew on them all the more. Since I wear him every day (multiple times!), I can't really be throwing the Ergo in the wash all the time to get the spit and saliva off of the straps from his chew-fests. I thought about buying the "official" drool pads with the carrier, but after seeing another tutorial, I figured I could just easily make my own.


The supplies! I don't think I need to list everything off... but you need the basic things (sewing machine, scissors, pins, etc), plus three fabrics (two for the outside and a middle layer, something like flannel) and velcro. I tend to raid the remnant rack at JoAnn fabrics... you can get nice fabric for half price there. Or I go to the thrift store and search there... I'm cheap, I know :] 

My outside layer that I wanted to "show" is a soft cotton, the back side is a soft flannel, and the inside is flannel as well. The inside flannel, which is the blue one, is just one of those flannel baby blankets. THRIFT STORE! :] The green fabric and grey fabric are from the remnant rack. 


I cut three rectangles from each fabric, for each drool pad. I cut out a 9 1/4" by 6 1/2" piece of paper and used that as my template to sew by, but I left the pieces of fabric with random edges that I would trim later. I like to do things the hard way. If I was doing it easier (and I totally suggest you do it this way), I would have just made my pattern 1/2" bigger on each side and just cut each piece of fabric out from there using my rotary cutter and mat. But no, I like to do things the hard way. :]


Lay each layer of fabric on the table, starting with the side UP that you want facing OUT. Place your second 'outer piece' face DOWN on that, and then finally put down your middle piece. 


If you want a strap to hang toys from, cut a piece of fabric, fold it, and sew it. It doesn't matter how long it is. 


Like I said before, I like to do things difficultly... so I drew around my pattern and planned to sew on that line.  DUMB. I don't know why I did that. The line isn't straight. I've never used a line before for sewing. Like I said before, I should have just made my pattern a little bigger and cut it out with my rotary cutter. OR... I could have used a ruler and made straight lines. That wouldn't have been a bad idea. No big deal, though. The above photo shows how you should place the "toy strap" on the fabric... but you want to place the loop towards the inside,  BETWEEN the two "outside pieces" of fabric (in my case, between the green patterned fabric and the grey fabric).


Pin it!


Then you sew around the edges, but leave an opening so you can turn your fabric the right way. After that, you trim away the excess fabric. It's best if you leave some fabric in front of the opening so that you have some fabric to tuck inside when you sew it again.


Turn it right side out. You should iron it flat at this point... but if your iron is still in storage (*sigh*) from when you moved to Kenya for a year... just pull the edges out as flat as you can.


Then stitch around the edge again, tucking in the little flaps in the opening.


Cut two piece of velcro to fit, and pin them on as shown above.


Then sew them on!


Aaaand... you have drool/chew strap covers. Not perfect by any means, but a fun and pretty simple project!


Unfortunately (well, actually, fortunately) my baby is taking a nap so I can't model him in the Ergo with his new strap covers. But I will sometime soon, and post a photo. But for now, you'll have to deal with my chair wearing the Ergo for me. ;]


*edited on 8/1/11 to add*

If you're here  from Craft Gossip Sewing... eek! I'm totally flattered and equally freaking out right now! I've never been featured on any other blog before!! Thanks for dropping by my humble little blog... link back to your blog so I can come say hi to you, too!! Oh, and here is one (not so great) photo of Ryan enjoying the Ergo with the toys and strap covers... I keep forgetting to take a  better photo!