Friday, January 28, 2011

Homemade Donuts

Jake asked me recently if I would try making donuts for him. I'm not really a huge fan of donuts... I'd rather eat something salty, like tortilla chips... but I like him a lot, so I thought I would give it a try... just for my husband.

I got the recipe that I used from The Pioneer Woman's blog. It was actually a pretty easy endeavor. My photos won't be nearly as good as the one on the blog I got the recipe from... but they'll do. 

For the donuts, you need:

  • 1 1/8 cups whole milk
  • 1/4 cup sugar
  • 2 1/4 teaspoons of instant or active dry yeast [equals one packet]
  • 2 whole eggs, beaten
  • 1 1/3 sticks unsalted butter, kind of melted 
  • 4 cups of all-purpose flour
  • 1/4 teaspoon salt

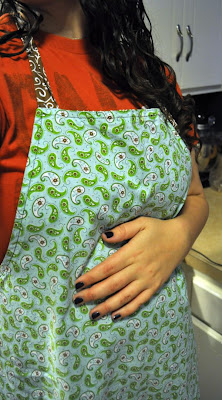
First... put on the super cute apron your mom made for you, and put your hand on your almost 40-week pregnant belly to quiet the energetic little one inside of you [who must be excited about donuts]. Okay, so those instructions were specifically for me... but wearing an apron is a good idea. It's fun, you look cute, and you feel domestic. Oh yeah, and you keep your clothes clean.


Put the milk in a microwave safe container and heat it until it's warm, but not hot. Somewhere between 105 and 115 degrees. If it's hot, it will kill your yeast. Add the sugar to the milk and stir it around. Pour it over the yeast, which you measured into another bowl. Stir it just a little bit, and then leave it alone for 10 minutes. 

While you're waiting, heat the butter in a bowl in the microwave. Don't melt it completely; just until you can stir it together and melt it all. You don't want it to get too hot because you'll be adding the eggs to the butter, and you don't really want scrambled eggs in your donuts. 

Crack your eggs into a separate bowl and beat them with a fork. Check your butter to make sure it's not too warm, and then add the eggs to the butter. Or the butter to the eggs, since the egg bowl won't be warm. Stir the entire time you are adding. Pour the egg/butter mixture into whatever bowl you are using to mix everything together. I used a Kitchen Aid mixer with the dough hook attachment. 

Turn on the mixer [medium low] and add the now-bubbling yeast mixture to the eggs and butter. Let the mixer  combine those ingredients. Measure out 4 cups of flour and add the salt to it. Then, slowly, 1/2 of a cup at a time, add the flour to the wet mixture, until all of the flour is gone. 

When the flour is gone, stop the mixer and scrape the bowl. Then set your timer for 8-10 minutes and let the mixer do its magic. Stop the mixer again and scrape the bowl... and then run the mixer again for just a minute. After the minute, stop the mixer, remove the hook, and let the dough sit for a few minutes. Then, grease a bowl and put the dough in it. Flip the dough over so the top is greased, cover it with plastic wrap [NOT foil] and put it in the fridge for at least 8 hours; overnight is ideal. 

The next day [or 8 hours later...], you can roll out the chilled dough on a lightly floured surface. You can either use a donut cutter, or a 3 inch round cookie cutter... or improvise, like I did, and use a 3 inch drinking glass to cut the donuts, and then a washed Snapple jar to cut the hole. 

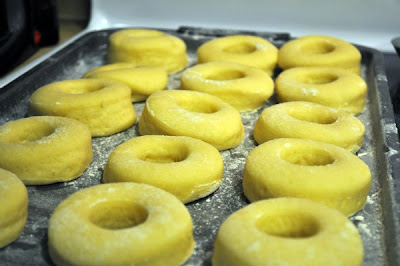
Roll out the dough to 1/4" or 1/2" thick, and cut out the donuts and their holes. Put them on a floured cookie sheet. 

[tangent] I had the Donut Man theme song stuck in my head ALL DAY because of this project... "Life without Jesus, is like a donut... like a donut... like a donut... life without Jesus, is like a donut, 'cause there's a hole in the middle of your heart..." [/tangent]


Aaaaaanyways.

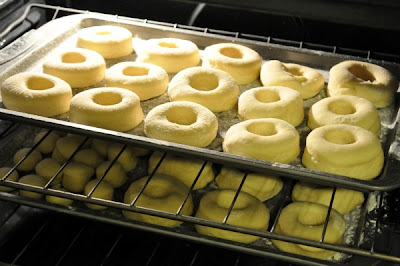
Now you need your donuts to rise. If you have a warm place to put them, go for it. This house is pretty cold, so what I did was turn the oven on to it's lowest temperature, and when I "thought" it was warm enough, I shut it off and put the donuts inside. They need to rise for at least an hour. 

Here's where the pictures finally come into play... yay! 

[here are the donuts rising in my warm oven]


[don't they look awesome? The Pioneer Woman said on her blog that you want them to look light and fluffy, not solid; as though if you breathed on them, they would collapse. I liked her description]

Then you are going to heat up some oil to 375 degrees. Don't use a thermometer like the one I have in my picture... I honestly don't think it was meant to leave in the oil during the heating process, and I think I kind of "fried" it [no pun intended]. 

[only 100 more degrees to go... *Jeopardy theme song plays*]

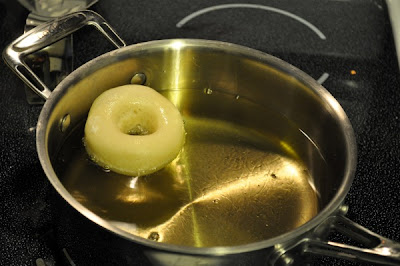
Stack a bunch of paper towels together on top of a paper bag. You'll be using this right after the donuts come out of the oil. When the oil has evened out and isn't getting any hotter, put in your first donut. It's probably good to just start with one so you can figure out how long it needs to cook. 

 [let it cook for about a minute]

 [turn it over with a slotted spoon]

I used a pancake flipper with slots in it because it was bigger. I found that if I held the donut slightly under the oil when I turned it on the 2nd side, then it didn't get an uncooked 'ring' around the middle of the donut. Take out the donut with tongs, spoon, or weapon of choice and hold it over the oil to let it drip. Put it on your paper towels. Count to five, then flip it over... repeat a few times, so that you can get as much oil off of the donut as you can. 

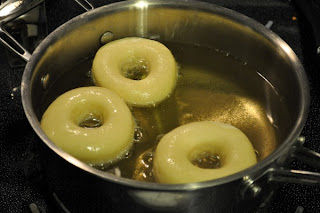
[now that you've figured out the perfect cooking time, you can do more than one at a time]
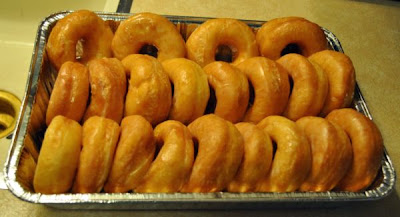
[golden perfection]

[after you've cooked all the donuts, you have to cook the donut holes, of course. These obviously won't take as long to cook as the donuts did. And these buggers are hard to "flip" because... well, they are circles. I found that holding them underneath the oil and kind of stirring them, that I was able to evenly cook them. Please don't burn yourself!]

Here is where you make the glaze, after you've finished making/draining your donuts. 

For the glaze, you need:

  • 3 cups powdered sugar
  • 1/2 teaspoon salt
  • 1/2 teaspoon vanilla
  • 1/2 cup cold water or milk 
[mix until smooth]

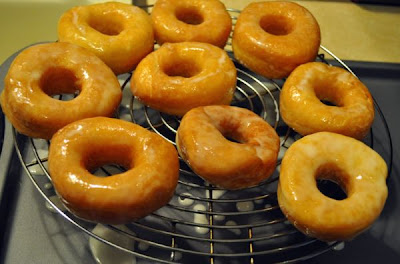
[put the donuts in the glaze, turn them over, and then pick them up to let the extra glaze drizzle off. Put them on a cooling rack, or improvise yet again as I did, on top of a baking sheet to catch the excess glaze]

[they'll always be 'sticky,' but after they've set a little bit, you can put them in a container or on a plate. Wa-la! They are finished. Now go and impress your husband.]


I accidentally doubled the amount of butter needed and had already added them to the eggs before I noticed anything. I didn't want to waste what I had already put together, so I doubled the whole recipe. Although it was considerably an 'easy' process, I really didn't want to have to do two batches of donuts... hence the reason why the other half of the dough is still chilling in the refrigerator. Maybe tomorrow...

Thursday, January 27, 2011

39 weeks

Well, here's another update... and baby has still yet to arrive... all in the Lord's time!

I had my 39 week appointment yesterday. It went well. I lost a little over a pound again this week, so my midwife said that if my nausea/vomiting doesn't go away after the baby comes, then we should look into gall bladder issues. She said it was nothing to worry about, but just that the gall bladder would be the first thing they look into if I was still sick. I'm still taking the Zofran [anti-nausea medication] but it really only takes the edge off off it and doesn't nearly take it away.

Baby's heart rate sounded good, and she thinks that the baby is anterior this time instead of posterior [basically a better position for birth]. My BP was a little higher than normal [for me] but not high enough to even begin worrying about. She also said that I'm a "very very healthy" 3cm dilated and that my body is "very ready." Obviously dilation numbers don't really MEAN much... you can either stay at a certain dilation for a while or dilate really fast, but it's nice to know that she thinks my body is getting super close.

She also used the "i" word... induction. That word freaks me out! But, it was nothing I didn't already know... she just mentioned that we would begin talking about it at my 41 week appointment if baby hadn't come by then, and that she wouldn't let me go further than 42 weeks [which is typical]. I honestly don't think I will go that long, but I don't know if that is just wishful thinking or a reality. I feel like it should be soon because my body has just been absolutely teasing me with some crazy contractions and other "signs" that labor is on the way... and then they disappear. The "baby-having" dreams at night time don't help, either! I guess we'll see :]

So, my due date is Sunday. Or Monday. The 30th/31st... the 30th was my date, and I've just kind of been using that one, generally... but the 31st is my midwife's date. Only 2-5% of babies are born on their dute date, though, so keep that in mind when asking me where the heck my baby is, if I pass my due date ;] You might get a reply like, "Oh, crap, I forgot to bring the baby AGAIN..." complete with an eye roll. :]

Time to go bake something... or clean something... or do something nesting-related!

Thursday, January 20, 2011

"Nesting"

"Nesting is the term used to refer to an expectant mother’s instinct which gives her a surge of energy which prompts her to clean and do various chores around her home. Nesting usually arises as the mother nears her due date." 

I guess apparently I have been nesting. A lot. I've been ready "emotionally" for baby for a long time... the thought of labor and delivery doesn't scare me [yet], because I'm so excited to meet our little one. I'm trying to keep in mind [and I also have a very good encourager in my husband] that the pain that comes with labor has purpose. It just seems different when you don't fear the pain that is to come; fear just seems to make it worse. There's such a huge bonus at the end, too... a baby! 


So anyways, today, I had the ambitious urge to cook lots of things. And cook lots of things I did. I made beef enchiladas, chicken alfredo with peas and corn, and wild rice soup. They're all put into containers, labeled and ready to be frozen. I also baked chocolate chip cookies, muffins and dinner rolls... those will be frozen, too.


And then I made myself a raspberry smoothie and plopped down on the couch, where I plan to spend the rest of the afternoon. :] 


Other things I've been up to... 


[organizing baby clothes]


[making a place for baby to sleep]


[packing the hospital bag]


[gathering 'diapering necessities']


[preparing my 'mommy station...' many hours will be spent in this chair; rocking, feeding, reading, loving]


...so, I've been staying busy. So what's left? Just: 


Wednesday, January 19, 2011

38 weeks


[38w3d]


Appointment update: not a whole lot of change... +1lb [had to make up for losing 1lb last week], BP = good, baby's heart rate = good... I'm dilated to just a little bit over 3cm now, so not much change in that regard; but my midwife said that the baby has moved down a bit and that things are 'doing what they need to,' so that's good. Baby is posterior, though [his/her back to my back], so a trip to the chiropractor might be of benefit. When babies are posterior, it can cause a lot of back pain... which is probably why my back has been hurting a lot lately... so if I get my back adjusted [by someone who works with pregnant women], it may make my back feel better and loosen things up so that baby can turn around. 

Part of me feels like I've been 'going backwards' because I haven't been having as many contractions this week as I was last week; but the contractions are very different than they were before... I don't just feel them in my belly anymore, but a lot lower. And they are more intense. So, although I feel like I'm not making any progress, I am. 

Anyways, I think that's all for now... hopefully my next update will be something along the lines of "I'm in labor" or "the baby's here!" But if not... oh well. Baby will come when he/she is good and ready. It's all in God's perfect timing! Our treasure will be here soon.

Thursday, January 13, 2011

Daily Bread Living


My friend Natalie is awesome. And she just started an awesome blog. I think you should check it out. That might make you more awesome. Who doesn't want to be awesome? :]

She's having a "blog launch" party on the 29th of this month. One of the ways to increase your chances of winning is to blog about her giveaways. Therefore this post comes into play! Of course I want to win cool stuff. BUT I also think you should check out her blog just for the fun of it. I know her blog will be one I find myself visiting often... living on a budget, children, recipes, family life... = all stuff I'm very interested in.

Anyways, to check out the giveaway details, go here. You can sign up to follow by e-mail, too! Check it out and enjoy, friends!!

37 weeks!

Well, actually, it's 37w4d. Regardless, it means two words: FULL TERM! Some people seemed to be confused when I told them I was full term... full term just simply marks the beginning of the maturity phase for a baby. It doesn't mean I'm due; it just means that baby can come safely at any point now!

I've been having a lot of braxton hicks contractions lately, like normal. Add into the mix some back/pelvic pain and a lot of nausea/vomiting, and you've got what my last week looked like. At my appointment at 36w, I was 1cm dilated. On Tuesday at my 37 week appointment, I was 3cm dilated. So it looks like things are 'progressing...' it doesn't necessarily mean baby is coming now or even within the next few days, but it does mean my body is doing what it is supposed to, which is exciting! The baby's heart rate continues to look good, and I tested negative for the group B strep bacteria [which, if I had tested positive for, I would have needed some IV antibiotics during labor]. So, things look well! I'm so ready to meet baby... emotionally more so than anything. The nausea is tiresome, but I'm not feeling 'done' being pregnant physically.

I fell yesterday at my parent's house, going down their icy stairs on their porch. It was only a few steps, but it definitely made my bum and back quite sore. I didn't feel the need to call my midwife because things seemed normal [and baby was being active], so I wasn't worried. Baby does seem lower today than before, though, so if anything, maybe it helped baby figure out that s/he needs to move down in order for "things" to happen. :]

I had two showers this last weekend; what a blessing to be given all sorts of 'baby things.' We appreciate it so much! Here are a few photos from the showers:

[1.08.11 - grandma's house - hosted by grandma, aunts and mom]


[cake made by my sister, sarah]


[corsage made by my grandma]


[friends!]

[opening gifts]

[1.09.2011 - at the hentges' house - hosted by friends, katie and sage]


 [friends! kristin and ailyse]

 [laura beth and me]


[being prayed over]


 [opening gifts]


After being blessed with all of those baby things, we are completely set and ready for baby to come... now all we do now is wait! We plan to call our parents when the baby is born, and they will be spreading the word to others. For the time being, we are requesting that only family visit the hospital when baby arrives; depending on how we are feeling when the time comes, we will decide if we are up to other visitors. Thanks for being understanding! We so appreciate your excitement, love and prayers. :] 

Photo Coasters

Just had to quickly share about an easy craft that I did. At a MOPS group I recently went to, this was the craft that was provided, but we ran out of time and were unable to complete it. I didn't have pictures with me anyways, so I brought the supplies home to do at a later time. I don't have pictures as the project goes on, but it's extremely easy so pictures aren't exactly a necessity.

Supplies needed:

-tiles
-glue [make sure it's a 'clear drying' kind]
-photos [I used ones printed on regular paper, not 'real' photos]
-foam brush
-sticky cork [to put on the back of the tiles so they don't scratch any surfaces]

I mixed the clear-drying glue with a little water to make it thinner. Then I lightly brushed the back of each photo with the glue and placed it on the tile. I glued the front of the photo to the tile as well, making sure that I glued the edges down very well. I used my finger to rub the glue into the picture some more, to make it lay down completely and to remove any air bubbles. Then I took a wet paper towel and removed the glue around the edge of the tile, but leaving the glue overlapping the photos a bit so that they wouldn't remove themselves. Let dry completely. I'm thinking about adding a 2nd coat of the glue/water mixture to the coasters to ensure complete coverage, but for now, here they are!


Grandma Bonnie's Chocolate Chip Cookies

It's just one of those days... the kind day where big snowflakes fall quietly to the ground... the sun just barely trying to peek out from behind the clouds... and where the chill makes you sharply catch your breath as you dash outside to get the mail. The kind of day that makes you want to stay inside, curled up on the couch with some steaming tea or coffee, snuggled under a blanket... listening to the silence, or digging your nose into a book.

Or a day that simply says: "Bake cookies!"

So I did.

I dug through my recipe box to find a recipe, when I came across Jake's grandma's cookie recipe. Which, I believe, is from HER mother. Old recipe = good recipe. So I gathered my ingredients and mixed up the dough.

[mix well:]
1 1/2 c. brown sugar
3/4 c. white sugar
1 c. shortening
3 eggs
1 tsp vanilla

[add:]
1 1/2 c. chocolate chips 

[add:]
3 c. + 6 tablespoons flour
1 1/2 tsp. baking soda
1 1/2 tsp. salt


Roll the dough into balls [but don't flatten]. 


Start a tray of cookies on the 2nd to bottom rack, and when they start to spread, move them to the 2nd to the top rack. She said she doesn't know how long to bake them for, but "until they look done."

Then take them out, leave them on the tray for a minute or two; then remove.


There USED to be 9 cookies... isn't there that rule about being able to eat any cookies that you accidentally "moosh" with the pot holder? ...okay, so maybe I just made that one up.

[Grandma Bonnie wisely told me
that she never questioned her mother's instructions
on how to bake cookies;
 that she just "did it."]


I think I hear a pot holder-mooshed cookie calling my name...